
前言:
如果你要做的圖片剛好是一個系列文章的標題精選圖片,但你沒有對方的原始檔案,該怎麼做?
本文將實際分享使用Adobe Capture與Photoshop Content Aware Fill 來改別人做的Banner的過程,可以了解如何將手機上 Adobe Capture APP 用在辨識現有字型,並透過CC cloud lirarby 雲端資料庫與桌機上Photoshop串接。直接編輯使用。
實作過程:
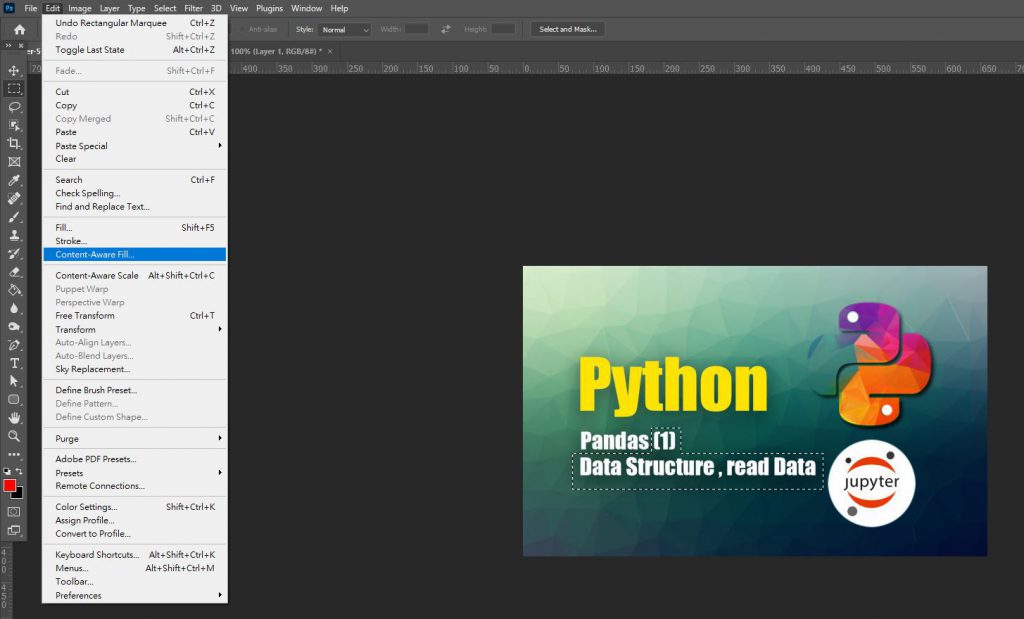
先將素材弄到手,可以看到下圖中的白字,並不是我們要的文字。

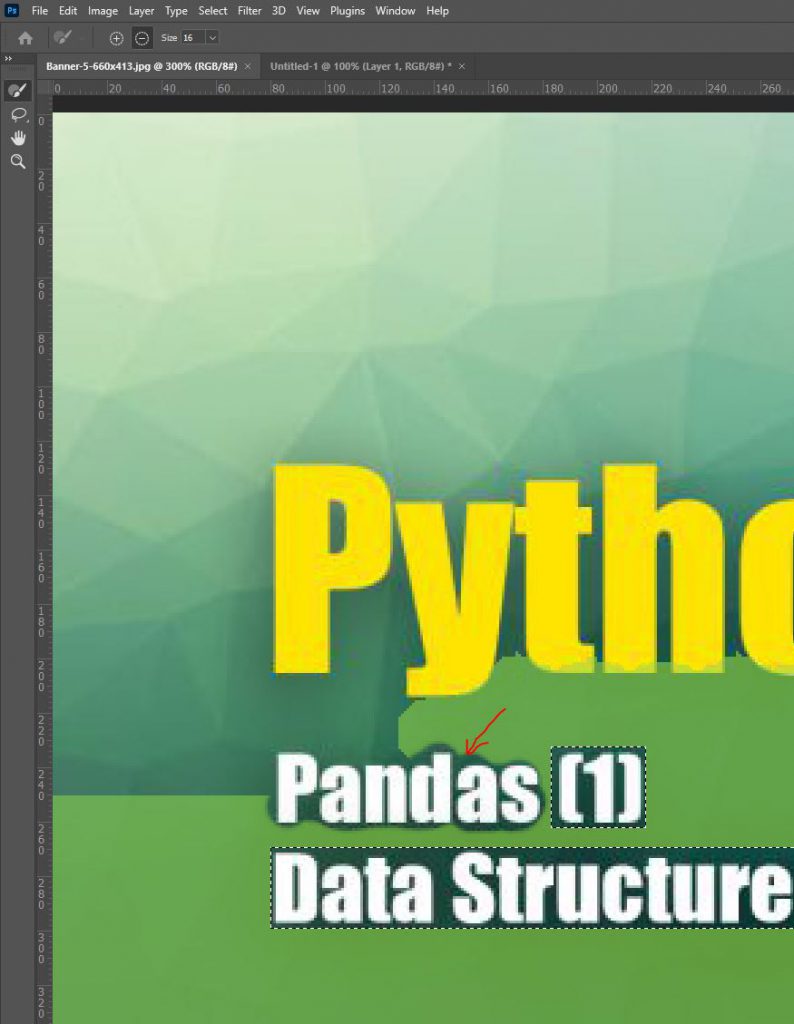
框選要抹除的文字範圍,接著用Content-Aware Fill指令
綠色的塗抹範圍就是電腦會自動從這些地方取材來把你圈選的地方抹掉。
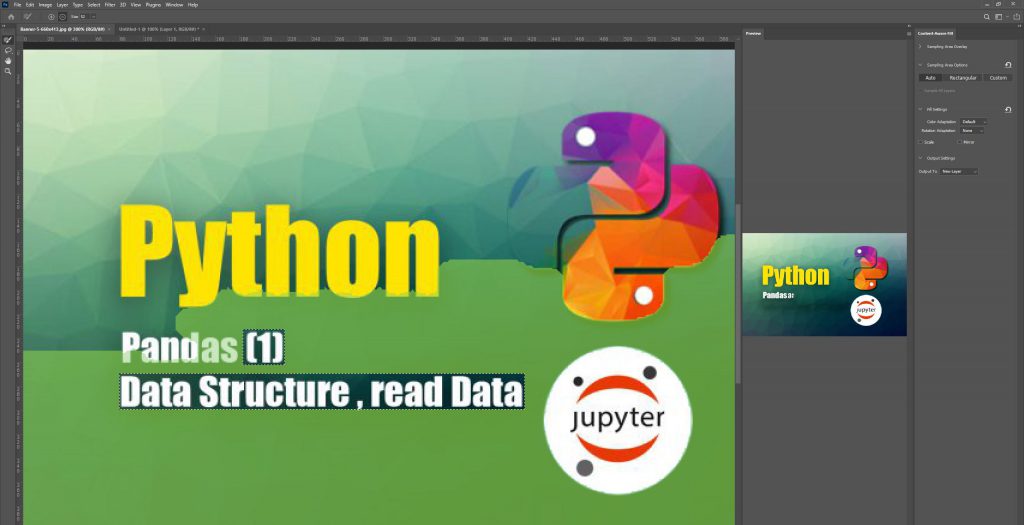
可以點選左上角 + – 號的筆刷,來進行增加 / 減少 綠色塗抹範圍
右邊有預覽視窗,可以選擇不同的填充方式,若將Color Adaption調成Very High,它會將像素複製的比較細小。
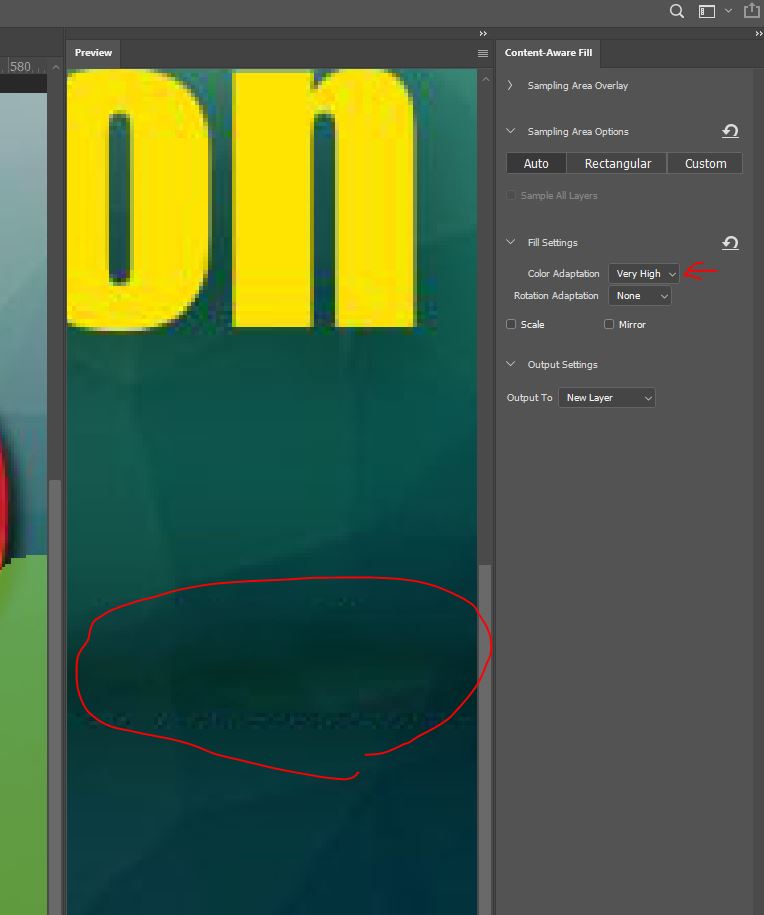
但像這種背景填塞,本來就是多邊形切削的質感,填色過細反而是破綻。改為預設值。
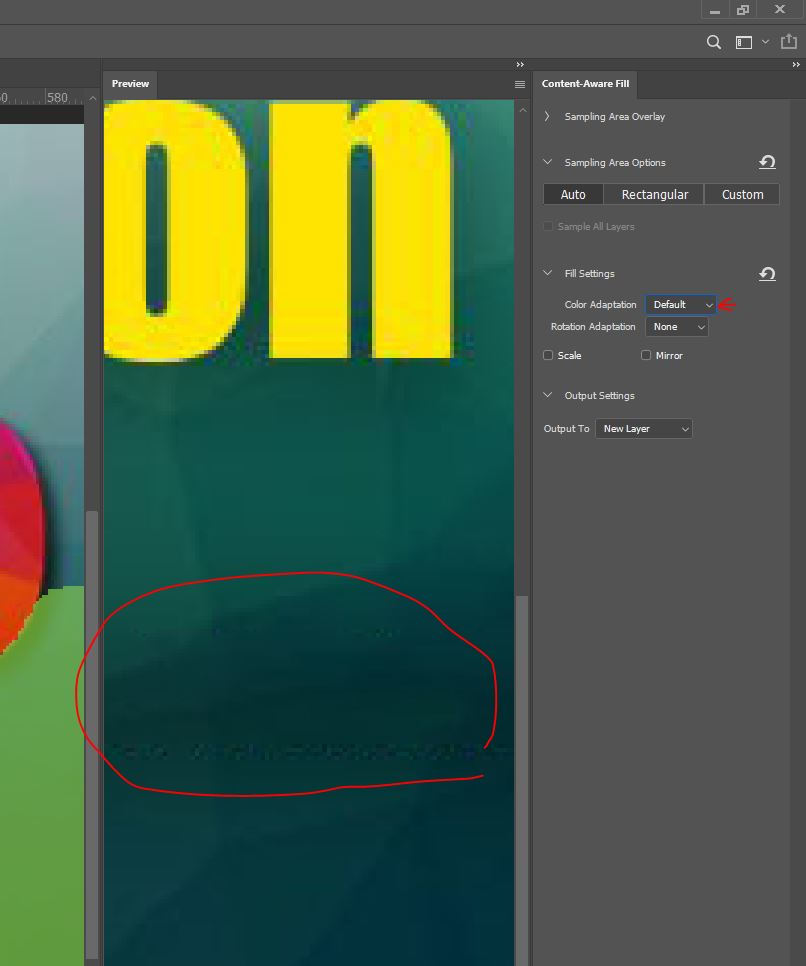
上述動作只要按下套用、確定。圖片上的白字就消失了。非常方便厲害。
Adobe Capture
接著我們開始用手機上的APP – Adobe Capture。這APP裡面可以透過手機擷取設計師想要的素材。素材種類很多,有字型、形狀、材質、色彩、Pattern、Looks等等
下面有幾個影片關於Adobe Capture 介紹,有興趣可以看看。
上面這支影片有介紹透過Capture直接做出Lut套用到 Premiere
這邊我們用來辨識原本舊圖上面的文字字型
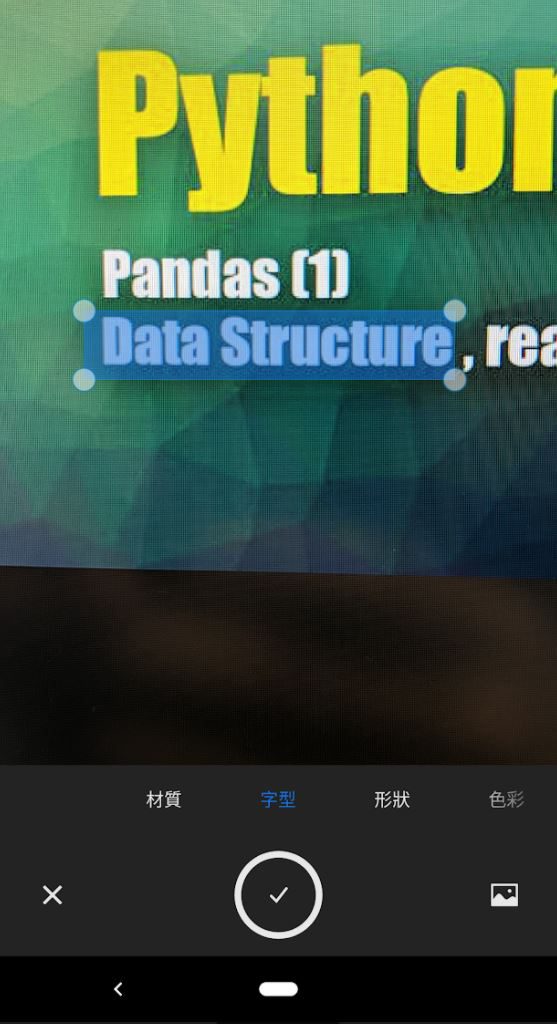
框選範圍以後,按下打勾,馬上就開始辨識了。
果然找到了!
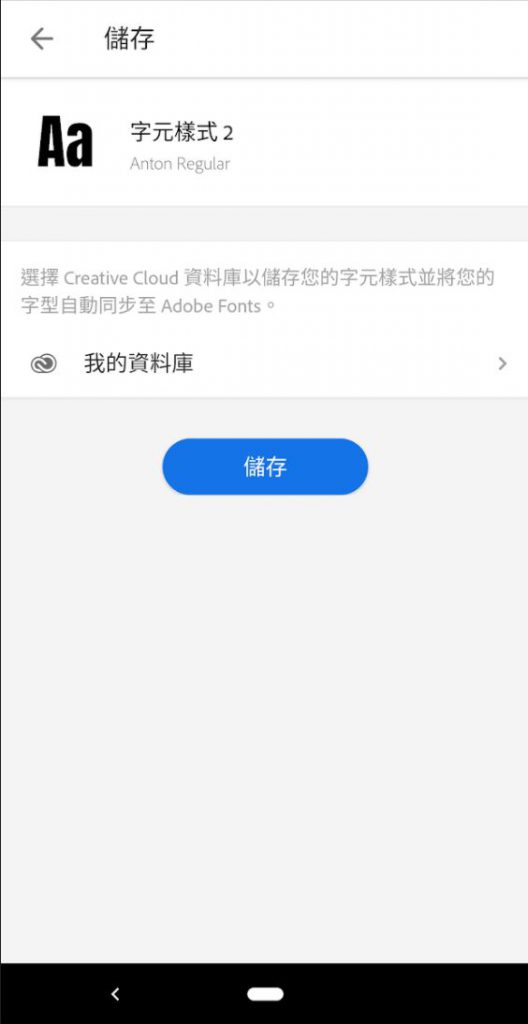
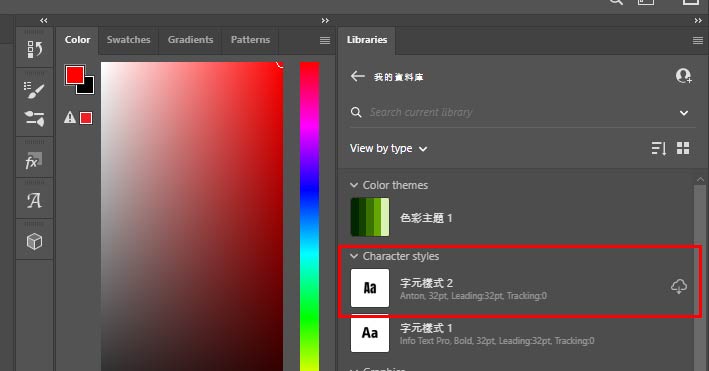
接著我們直接在手機內儲存到雲端資料庫
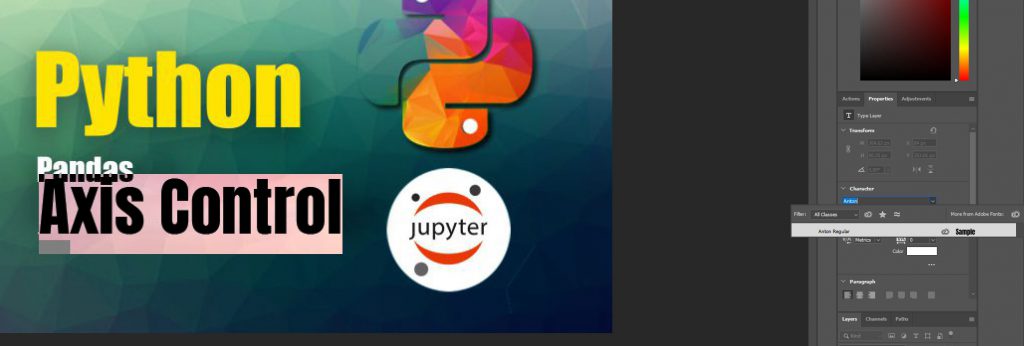
接著我們在Photoshop就能看到這個字型。
把我們想要的內容打上去。
看起來是不是像原本作者所創作的標題呢?

結論:
以上就是使用Adobe方案,從手機到桌機,快速的把現有的圖片進行修改。雖然上面圖片好像很多,事實上,整個流程大概兩三分鐘就結束了。科技進步,設計師要時時掌握新工具,免得浪費生命。